What this video quality enhancer does
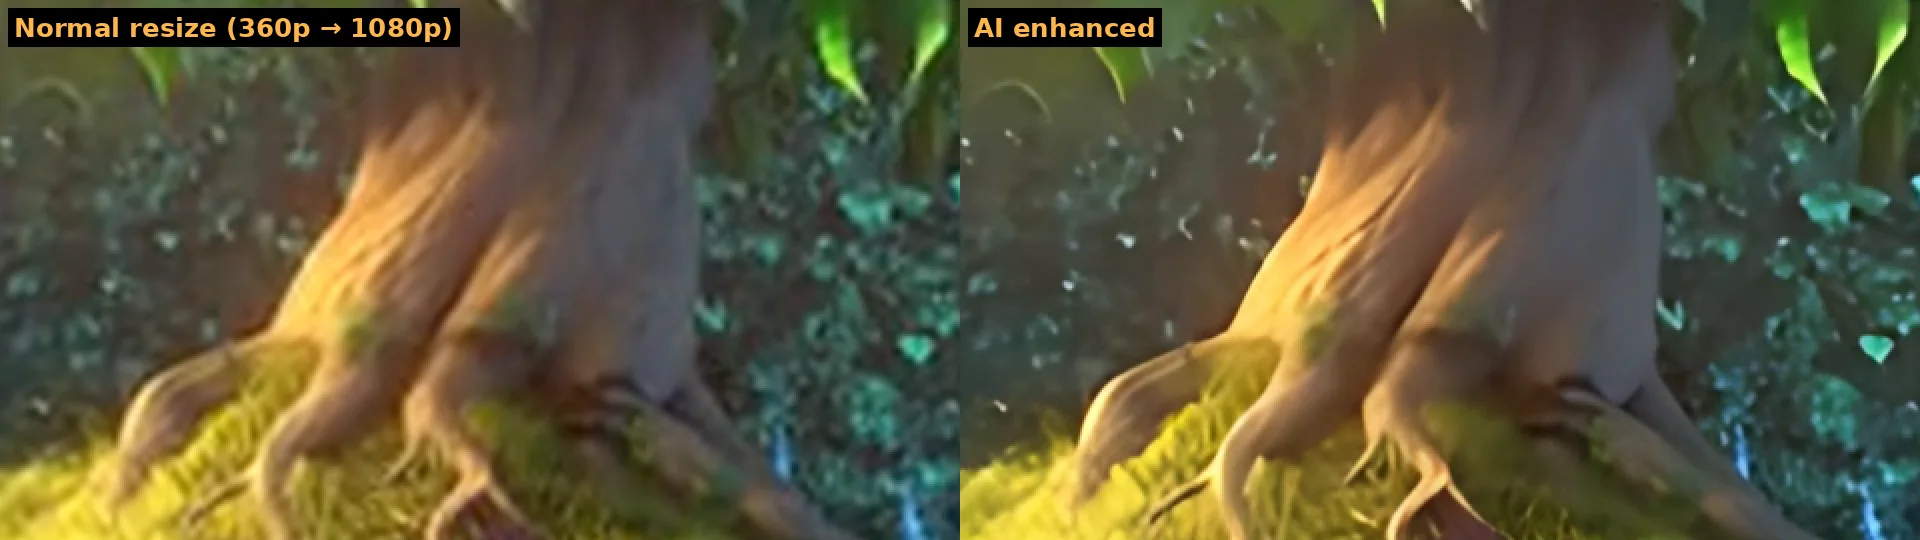
Most "enhance" buttons only make a video bigger. Stretching a 360p clip to 1080p gives you the same blur on a larger canvas, often with compression blocks that become even more visible. This tool uses an AI super-resolution model, Real-ESRGAN, which was trained on millions of pairs of degraded and clean images. Instead of stretching pixels it predicts what the edges, textures and lines should look like, removes blocky compression artifacts and rebuilds the picture at four times the resolution. The result is then scaled to the size you choose.
For video that looks choppy rather than blurry, the second mode adds frames. A motion model called RIFE estimates how every part of the picture moves between two frames and paints a brand-new frame in the middle, turning 24 or 30 fps footage into smooth 48 or 60 fps.
How to enhance video quality in three steps
- Drop your video into the box above. MP4, MOV, WebM and MKV files work as long as your browser can decode them, which covers almost every phone and camera file.
- Pick what you want. "Enhance & upscale" sharpens and enlarges the picture; choose 1080p, 2K or 4K and whether the clip is real footage or anime. "Smooth 60 FPS" doubles the frame rate instead.
- Preview three seconds first. The tool processes a short piece from the middle of your clip, shows a before/after slider and tells you how long the full video will take on your device. If you like it, press Enhance full video and download the MP4 when it is done.
Keep the tab open and visible while it works: browsers slow down background tabs, and closing the tab stops the job because the processing happens on your computer, not on a server.
Why a free video quality enhancer that runs in your browser
Most online video enhancers upload your file to a cloud GPU, charge credits per second of footage and put a watermark on free results. Desktop programs give great results but cost money and need installing. Running the model in the browser removes both problems. Your graphics card does the work through WebGPU, a modern browser feature that gives web pages access to the GPU, so there is no upload, no queue, no file-size limit set by a server and nothing to install.
- Private: family videos, work recordings and anything confidential stay on your device.
- No limits imposed by us: clip length and resolution are limited only by your hardware and patience.
- No watermark and no account. Download the file and use it anywhere.
- Honest preview: you see the real result on your clip and the real time estimate before committing.
What results to expect
AI enhancement is very good at some problems and limited on others. Knowing which helps you pick the right setting.
| Problem in your video | What the enhancer does | Best setting |
|---|---|---|
| Low resolution (240p–480p) | Big visible improvement: sharper edges, readable shapes, cleaner colors | Enhance & upscale to 1080p |
| Compression blocks and banding | Mostly removed; flat areas become smooth | Enhance & upscale, any size |
| Soft focus, mild blur | Edges become crisper; fine texture is simplified | Enhance & upscale to 1080p or 2K |
| Cartoon or anime | Clean lines and flat color areas | Content: Anime / cartoon |
| Choppy motion, low frame rate | New in-between frames, smooth playback | Smooth 60 FPS |
| Heavy motion blur, very dark noise | Limited improvement; nothing can invent details that were never recorded | Try the preview first |
One honest note: the model replaces some very fine textures, like grass or skin pores, with smoother, cleaner versions. For most low-quality clips that looks much better than the original, but for already sharp 1080p footage the gain is smaller. In that case choose 4K output or skip enhancement.
Speed: how fast is the enhancer on your computer?
Everything depends on your graphics card. These are our measurements on a mid-range desktop GPU (NVIDIA RTX 4060 Ti) in Chrome, including decoding and encoding:
| Job | Speed | One minute of 30 fps video |
|---|---|---|
| 270p → 1080p | ≈ 8 frames/s | ≈ 4 minutes |
| 360p → 1080p | ≈ 5–6 frames/s | ≈ 5–6 minutes |
| 540p → 4K | ≈ 2.5 frames/s | ≈ 12 minutes |
| 720p, 30 → 60 fps | ≈ 11 frames/s | ≈ 3 minutes |
| 1080p, 30 → 60 fps | ≈ 6 frames/s | ≈ 5 minutes |
Laptops with integrated graphics are several times slower, and computers without WebGPU use the processor, which is slower still. That is why the tool always measures your device in the 3-second preview and shows the estimate up front.
Tips for the best video quality
- Start from the original file. A video re-downloaded from a messaging app has been compressed again; the first copy from the phone or camera always gives a better result.
- Pick the smallest output you need. 1080p is enough for phones, social media and most TVs and is four times faster than 4K.
- Trim first. If you only need a short part, cut it before enhancing to save time.
- Use the anime setting for drawn content. It keeps lines clean instead of adding photo-like texture.
- Upscale and smooth in two passes if you want both: first upscale, then run the 60 fps mode on the result.
Looking for a specific job? The video upscaler page explains resolutions in depth, 480p to 1080p covers old DVDs and phone clips, and frame interpolation covers smooth motion and slow motion.